

Creating chocolate covered cherries in a mold elevates the classic confection into elegant, professionally finished treats perfect for gifts and special occasions. This comprehensive guide reveals professional techniques for crafting bakery-quality cherry chocolates using specialized molds, proper tempering methods, and the enzyme science that creates the distinctive creamy interior.
Understanding Chocolate Covered Cherry Fundamentals
Molded chocolate covered cherries differ significantly from simple dipped versions through their constructed shell design and controlled filling process that ensures consistent appearance and texture.
The Science of Liquid Centers
The magic behind molded chocolate covered cherries lies in invertase enzyme action that transforms solid fondant into liquid cream surrounding the cherry. Fresh fondant starts firm enough to handle during molding but gradually liquefies over 1-2 weeks as invertase breaks down sucrose into glucose and fructose. This enzymatic process creates the signature liquid center without requiring liquid filling during assembly.
Professional chocolate covered cherries require careful timing between molding and consumption. Maximum liquefaction occurs 2-3 weeks after production, though chocolates remain delicious for 4-6 weeks when stored properly. Understanding this timeline allows chocolatiers to plan production schedules ensuring optimal texture when chocolates reach consumers.
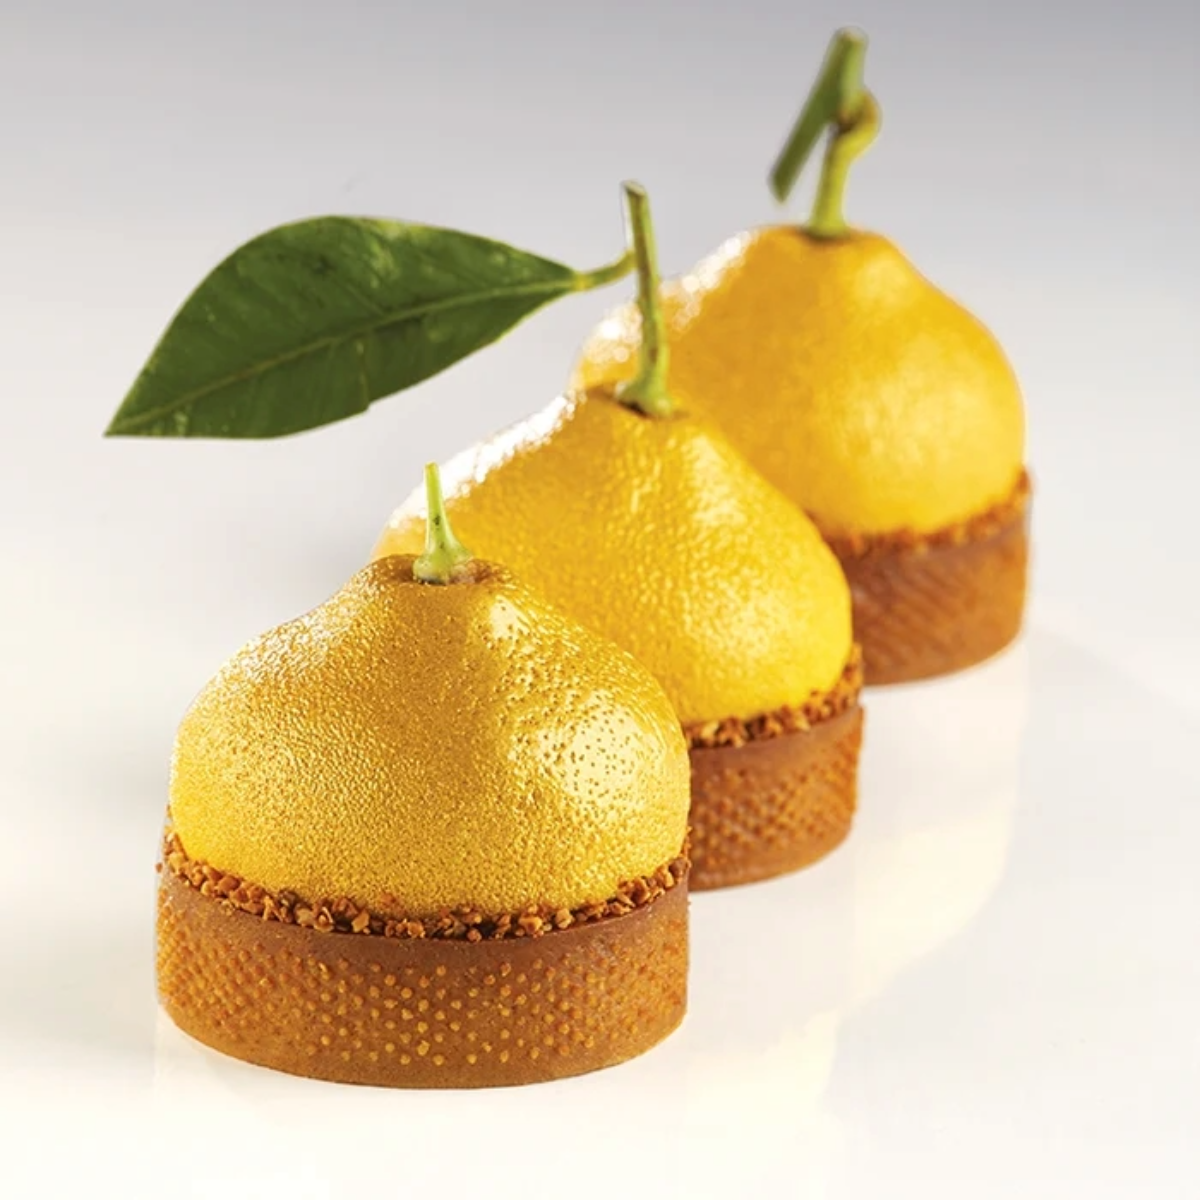
Essential Mold Selection
Choosing appropriate molds determines your success rates. Cherry sizes vary considerably, so select molds that accommodate your fruit dimensions with adequate room for fondant coating. The Chocolate Mold Heart 95mm CW1147 works beautifully for large cherries, while smaller fruits fit perfectly in standard sphere molds.
|
Cherry Size |
Recommended Mold Type |
Cavity Dimensions |
Yield |
|
Small (Maraschino) |
Round/sphere molds |
30-35mm diameter |
24-30 per mold |
|
Medium (Standard) |
Half-sphere, oval |
40-45mm diameter |
15-20 per mold |
|
Large (Premium) |
Heart, dome shapes |
50-60mm diameter |
8-12 per mold |
Polycarbonate molds from our chocolate molds collection produce the glossiest finish, while silicone molds offer easier release for beginners.

Essential Ingredients and Equipment
Ingredient Requirements
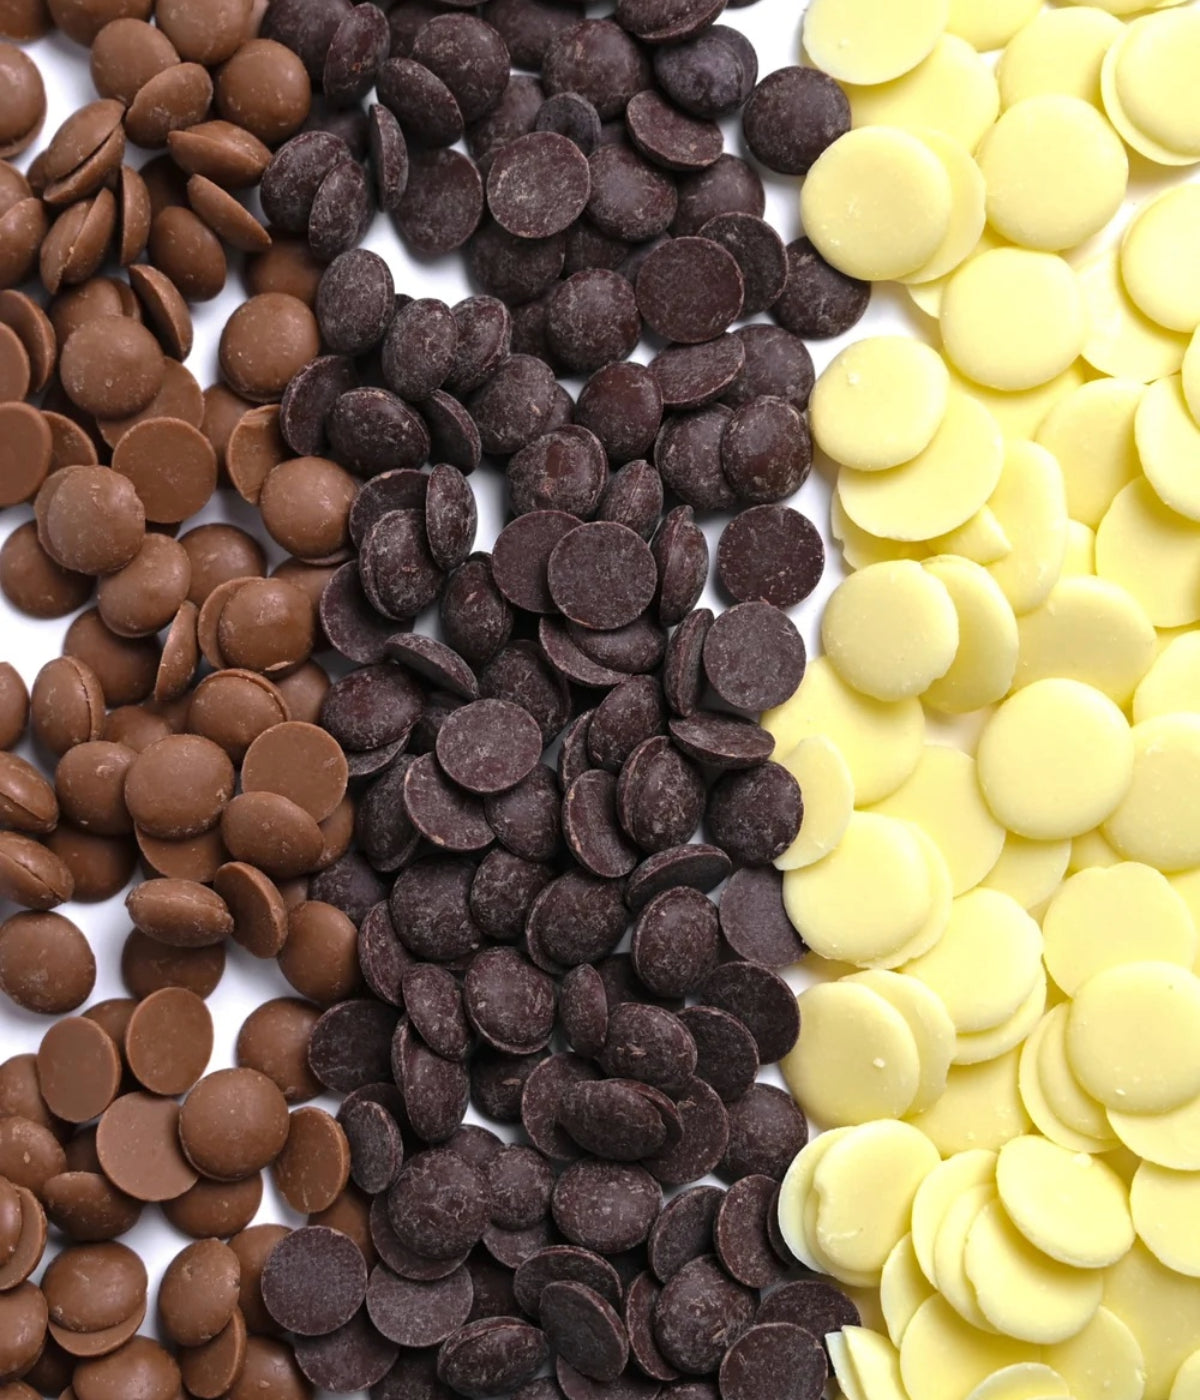
High-quality ingredients make all the difference. Choose couverture chocolate containing minimum 31% cocoa butter for proper flow and temper. Dark Chocolate 55% Venezuela provides rich flavor complementing cherry sweetness, while FCH Milk Chocolate Latin American Origin 44% offers milder taste.
Fresh or quality jarred cherries with stems intact create premium results. Maraschino cherries work well though their sweetness requires balancing with darker chocolate. Drain cherries thoroughly and pat completely dry; any moisture causes chocolate to seize and fondant to thin excessively.
Invertase enzyme, available through specialty baking suppliers, proves essential for liquid center development. Use food-grade invertase specifically formulated for confectionery applications. Fondant ingredients include powdered sugar, corn syrup, water, and the invertase enzyme. Some recipes substitute glucose syrup for corn syrup with excellent results.
Required Tools and Equipment
Successful molded cherry chocolates require specific equipment beyond basic kitchen tools. A digital thermometer ensures accurate chocolate tempering, while rigid plastic scrapers remove excess chocolate cleanly from mold surfaces.
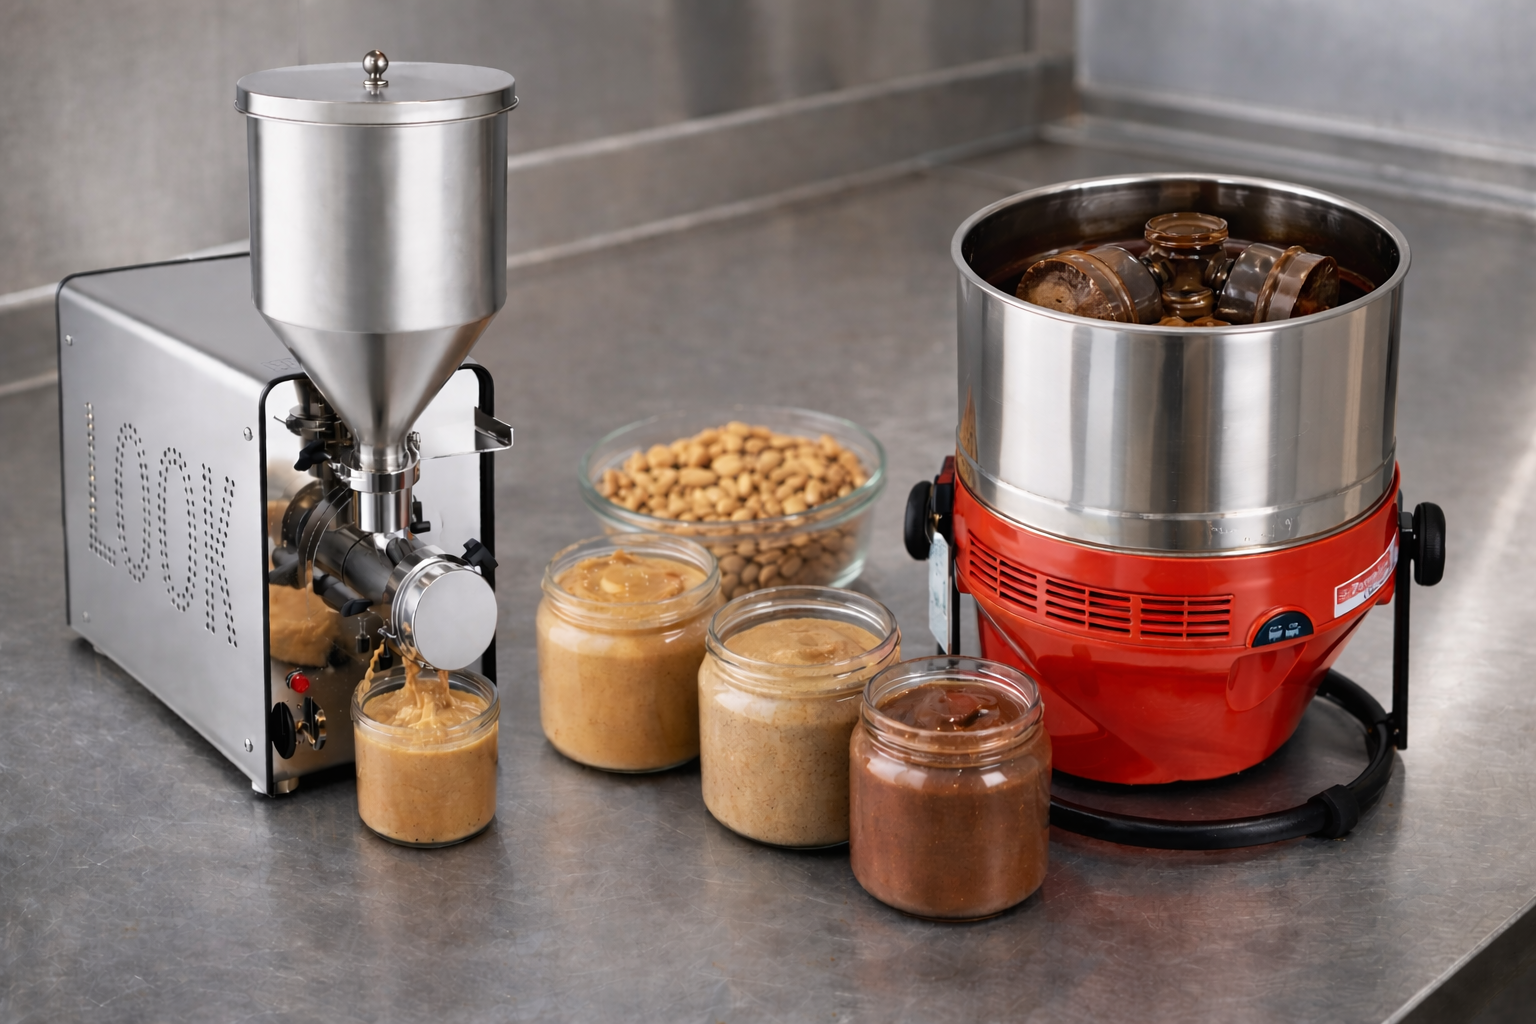
Professional chocolate work benefits from quality melting equipment. The Chocolate Melter 6kg Capacity maintains consistent temperatures during extended sessions, while tempering machines automate the process for foolproof results. Professional spatulas help spread chocolate evenly and manipulate fondant precisely.
Additional supplies include parchment paper, small brushes for detail work, and dipping forks for positioning cherries carefully. Storage containers maintaining proper humidity and temperature protect finished chocolates during the enzyme activity period.
Preparing Cherries and Fondant
Proper preparation determines final quality, with attention to moisture control and fondant consistency proving critical for success.
Cherry Preparation Techniques
Begin with thorough cherry preparation to prevent moisture problems. Drain jarred cherries completely, reserving liquid for other uses. Spread cherries on paper towels and pat surfaces dry, then air-dry for 30-60 minutes ensuring complete exterior moisture removal.
Trim cherry stems to approximately 1/2 inch length for easier handling and attractive presentation. Longer stems complicate molding while short stems lose visual appeal. Inspect each cherry for damage or excessive softness; reject any fruit showing deterioration that could compromise quality.
Some professionals dip cherry stems briefly in melted chocolate before fondant coating, creating a moisture barrier that prevents stem deterioration. This optional step adds protection though proper drying typically proves sufficient.
Making Invertase Fondant
Creating proper fondant with invertase ensures your chocolates develop signature liquid centers. Combine 3 cups powdered sugar, 3 tablespoons corn syrup or glucose syrup, 1/4 cup water, and 1/4 teaspoon invertase enzyme. Mix until smooth, pliable consistency forms, similar to modeling clay or soft playdough.
|
Ingredient |
Amount |
Purpose |
Substitutions |
|
Powdered Sugar |
3 cups |
Structure, sweetness |
Superfine sugar (adjust ratio) |
|
Corn Syrup |
3 tablespoons |
Prevents crystallization |
Glucose, honey (affects flavor) |
|
Water |
1/4 cup |
Hydration, workability |
Reduce for firmer fondant |
|
Invertase |
1/4 teaspoon |
Creates liquid center |
No substitute available |
Knead fondant until uniform consistency develops, adding powdered sugar if too sticky or water drops if too dry. Proper fondant should wrap around cherries without cracking yet remain firm enough to maintain shape during assembly. Allow fondant to rest 30 minutes before use, enabling full hydration and easier handling.
Wrapping Cherries in Fondant
Coat each cherry completely in a thin fondant layer. Roll a small fondant ball slightly larger than the cherry, flatten into a disc, and wrap around fruit completely. Work fondant gently upward around cherry, pressing to eliminate air pockets while leaving stem exposed.
Aim for even 1/8 to 1/4 inch fondant thickness surrounding each cherry. Thicker fondant creates larger chocolates and more liquid center but requires bigger molds. Thinner coating produces delicate liquid center with stronger fruit flavor prominence. Smooth fondant surface carefully; any irregularities telegraph through the chocolate shell affecting finished appearance.
Place wrapped cherries on a parchment-lined tray and refrigerate 30 minutes to firm fondant for easier handling. Cold, firm fondant resists deformation when positioning in chocolate shells.
The Chocolate Molding Process
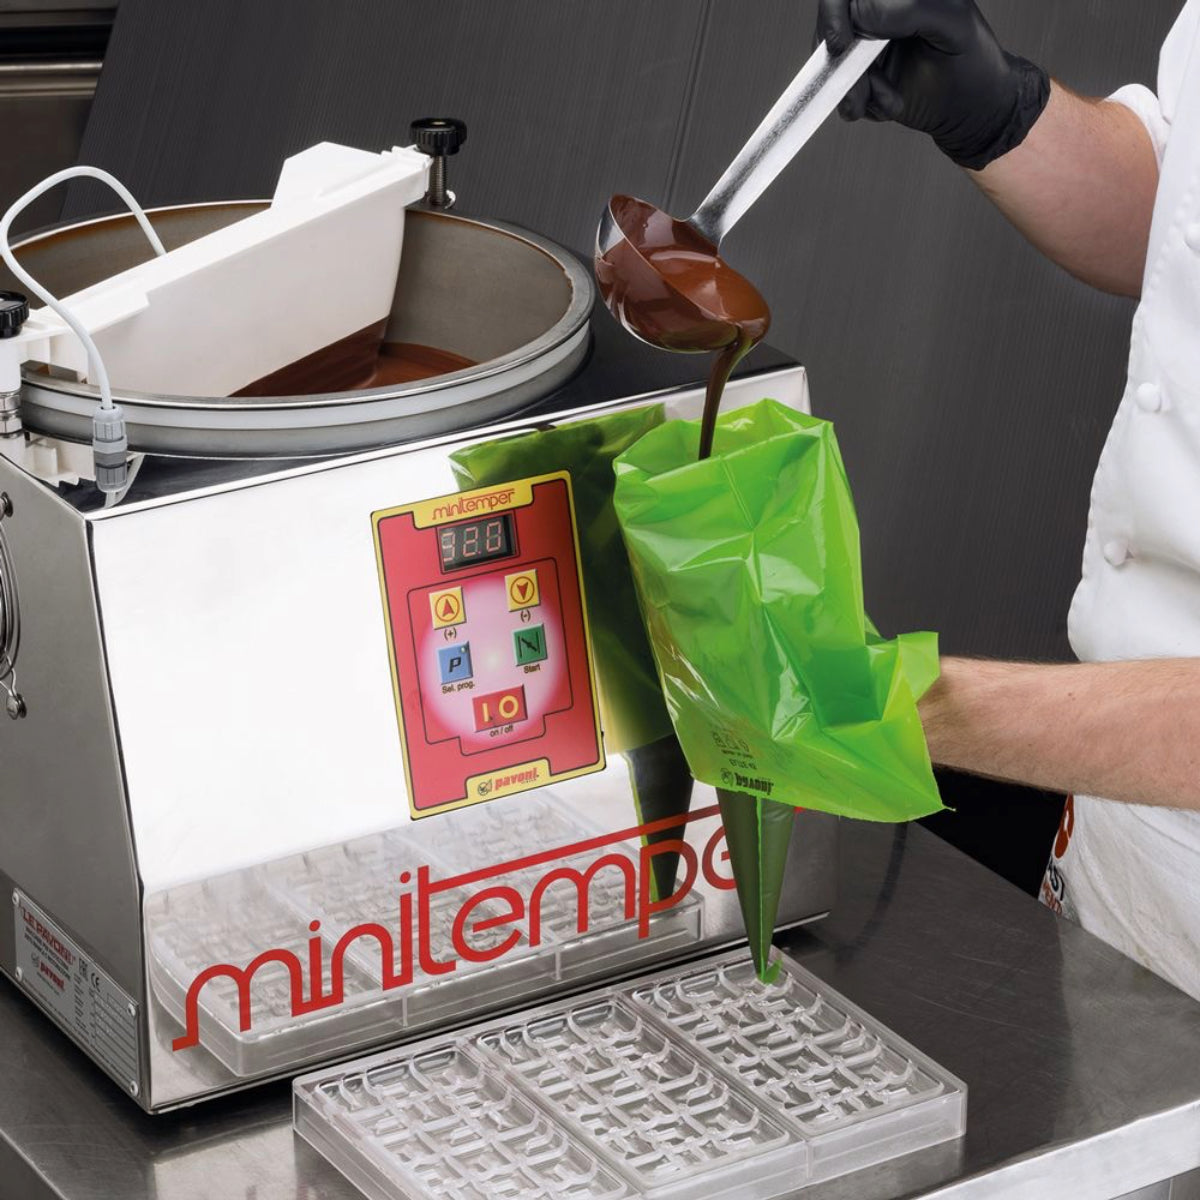
Tempering Chocolate Properly
Properly tempered chocolate snaps cleanly, releases from molds easily, and resists bloom. Melt two-thirds of chocolate to appropriate temperature: 115-120°F (46-49°C) for dark chocolate, 110-115°F (43-46°C) for milk chocolate. Add remaining chocolate gradually while stirring until temperature drops to 82-84°F (28-29°C).
Reheat gently to working temperature: 88-90°F (31-32°C) for dark, 86-88°F (30-31°C) for milk chocolate. Test temper by spreading a small amount on parchment; properly tempered chocolate sets within 3-5 minutes with slight matte finish becoming glossy. Professional chocolate tempering machines automate this process for consistent results.
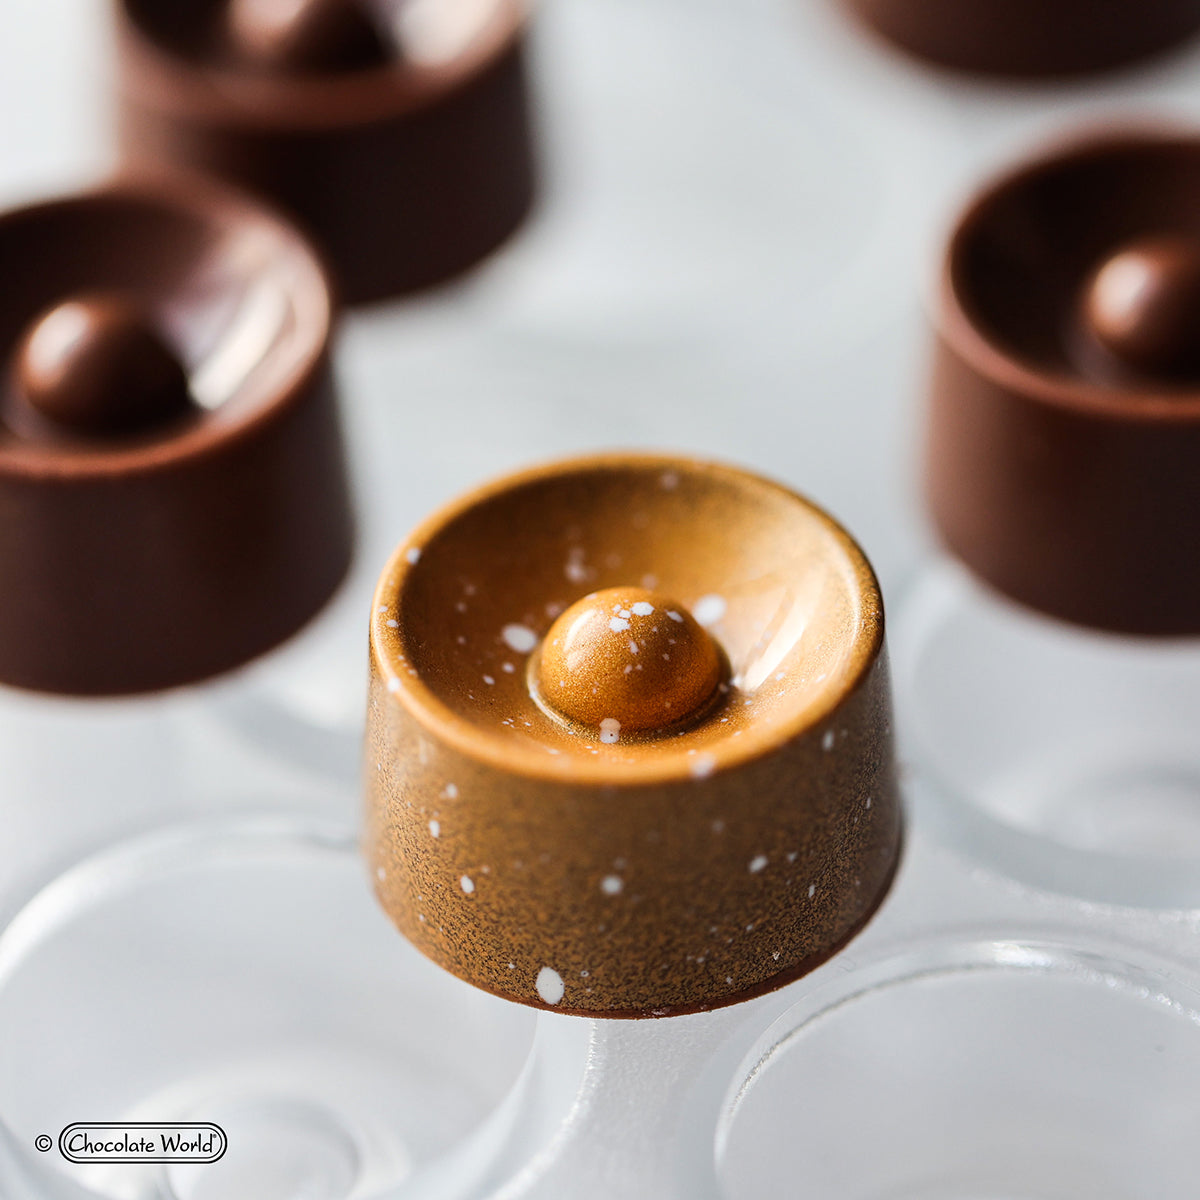
Creating Chocolate Shells
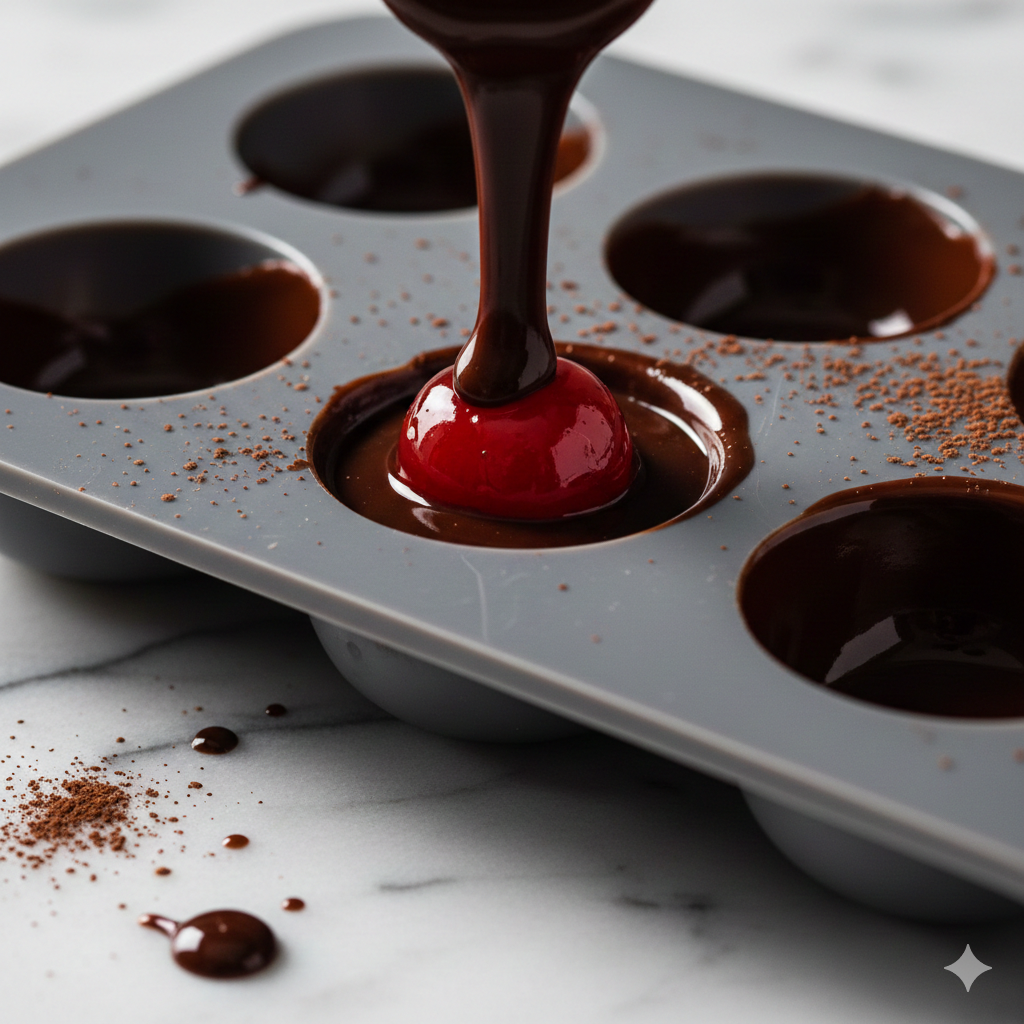
Pour tempered chocolate into prepared mold cavities until half full. Tap mold firmly on counter 10-15 times releasing air bubbles. Use a spatula spreading chocolate evenly across cavity bottoms ensuring complete coverage.
Allow base layer to crystallize until surface appears matte but remains slightly tacky, approximately 5-8 minutes. This partial set creates proper thickness while maintaining stickiness for cherry adhesion. For thicker shells providing better cherry support, apply a second coating layer repeating the process.
Positioning Fondant-Wrapped Cherries
Place chilled fondant-wrapped cherries into prepared chocolate shells carefully. Center each cherry in cavity ensuring even chocolate thickness around all sides. Press down gently creating good contact with base chocolate without forcing cherries through the bottom layer.
Position cherry stems upright for aesthetic presentation or angle them slightly if mold design permits. Avoid touching chocolate shell interiors with fingers; use clean dipping forks or small tools for precise positioning. Any fingerprints mar finished appearance.
Leave adequate space above cherries for sealing chocolate layer. Fondant-wrapped cherries should sit approximately 1/8 inch below mold rim allowing proper chocolate covering. Cherries placed too high create thin tops prone to cracking; excessive depth produces thick, unbalanced shells.
Sealing with Top Chocolate
Pour additional tempered chocolate over positioned cherries, filling cavities completely. Tap mold vigorously eliminating air pockets between fondant and chocolate. Use a scraper removing excess chocolate from mold surface, creating a clean flat backing.
Pay special attention to cherry stem areas ensuring complete chocolate coverage without air gaps. These vulnerable spots often develop leaks if chocolate doesn't seal properly around stems. Some chocolatiers clip stems flush and seal completely, while others preserve stems accepting slightly higher leak risk for presentation value.
Allow chocolates to crystallize completely at room temperature for 30-45 minutes or refrigerate 15-20 minutes if needed. Chocolate contracts during setting, naturally releasing from mold walls. Premature demolding causes surface damage; wait until chocolate develops a satin finish indicating complete crystallization.

Advanced Decoration Techniques
Adding Color with Cocoa Butter
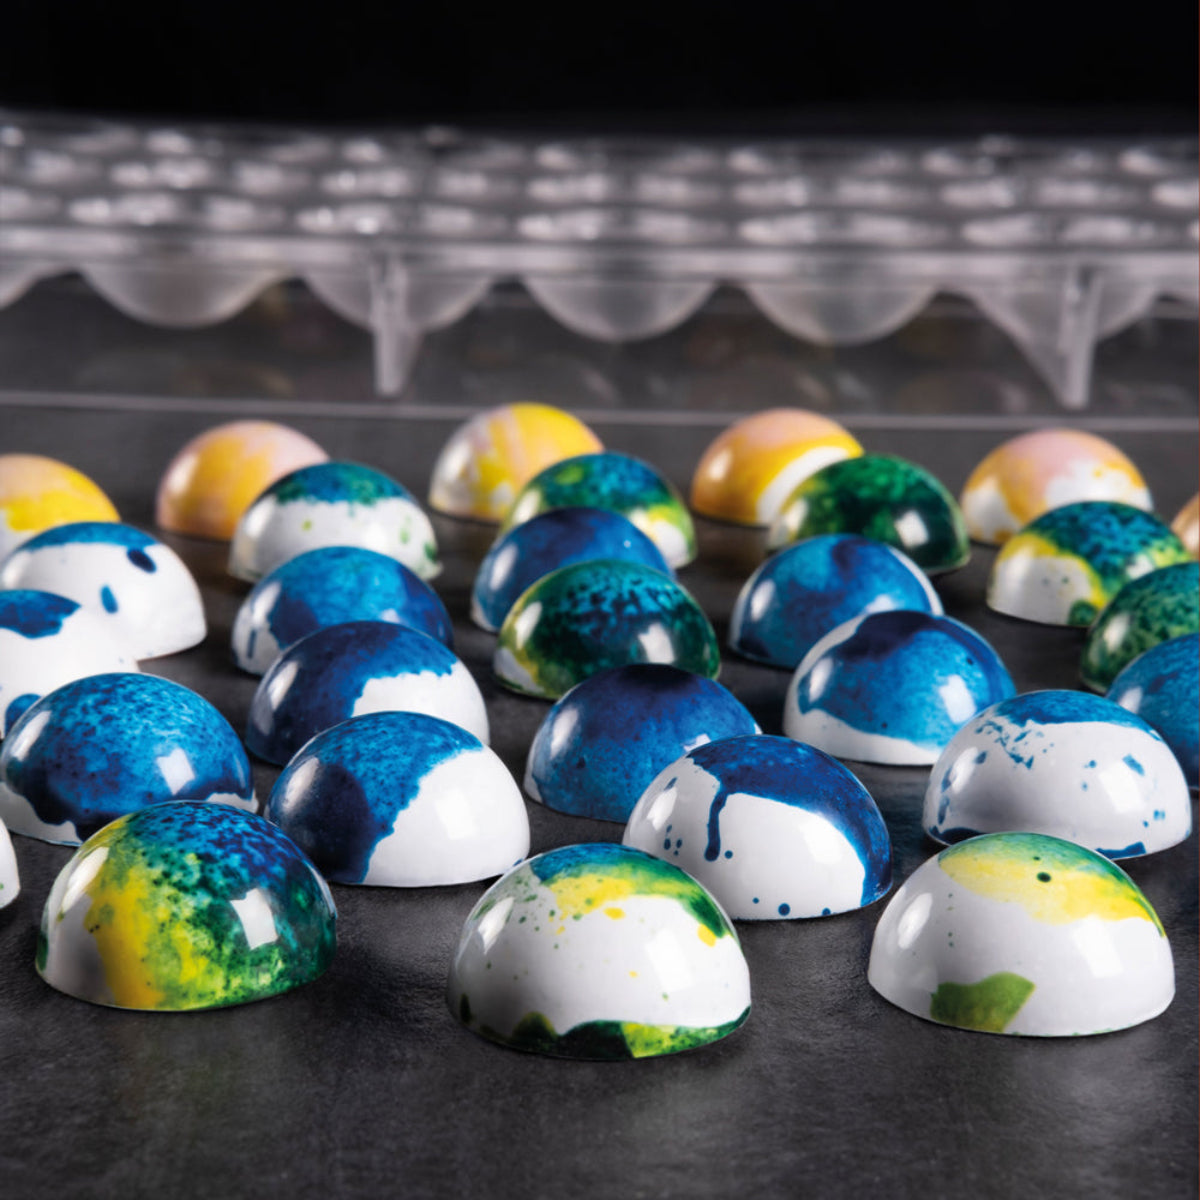
Painted chocolate shells create stunning appearances. Warm cocoa butter colors to liquid consistency and paint designs directly into clean molds before adding chocolate. For gradient effects, professional spray equipment delivers results maintaining optimal temperature preventing crystallization.
Apply light coats allowing each to set before adding subsequent layers. Build color gradually for depth and dimension in decoration. Cherry motifs painted in coordinating red tones announce filling flavor while gold accents add luxury appeal.
Using Transfer Sheets
Transfer sheets provide instant professional decoration without painting skills. These sheets with various patterns adhere to tempered chocolate, releasing intricate designs as chocolate sets. Cut transfer sheets fitting mold dimensions and place printed side against chocolate immediately after pouring the base layer.
Position cherries as usual, then add sealing chocolate layer. Transfer patterns appear on chocolate backing after demolding, creating decorated chocolates effortlessly. Seasonal designs perfect Valentine's Day or holiday presentations.
Final Finishing Touches
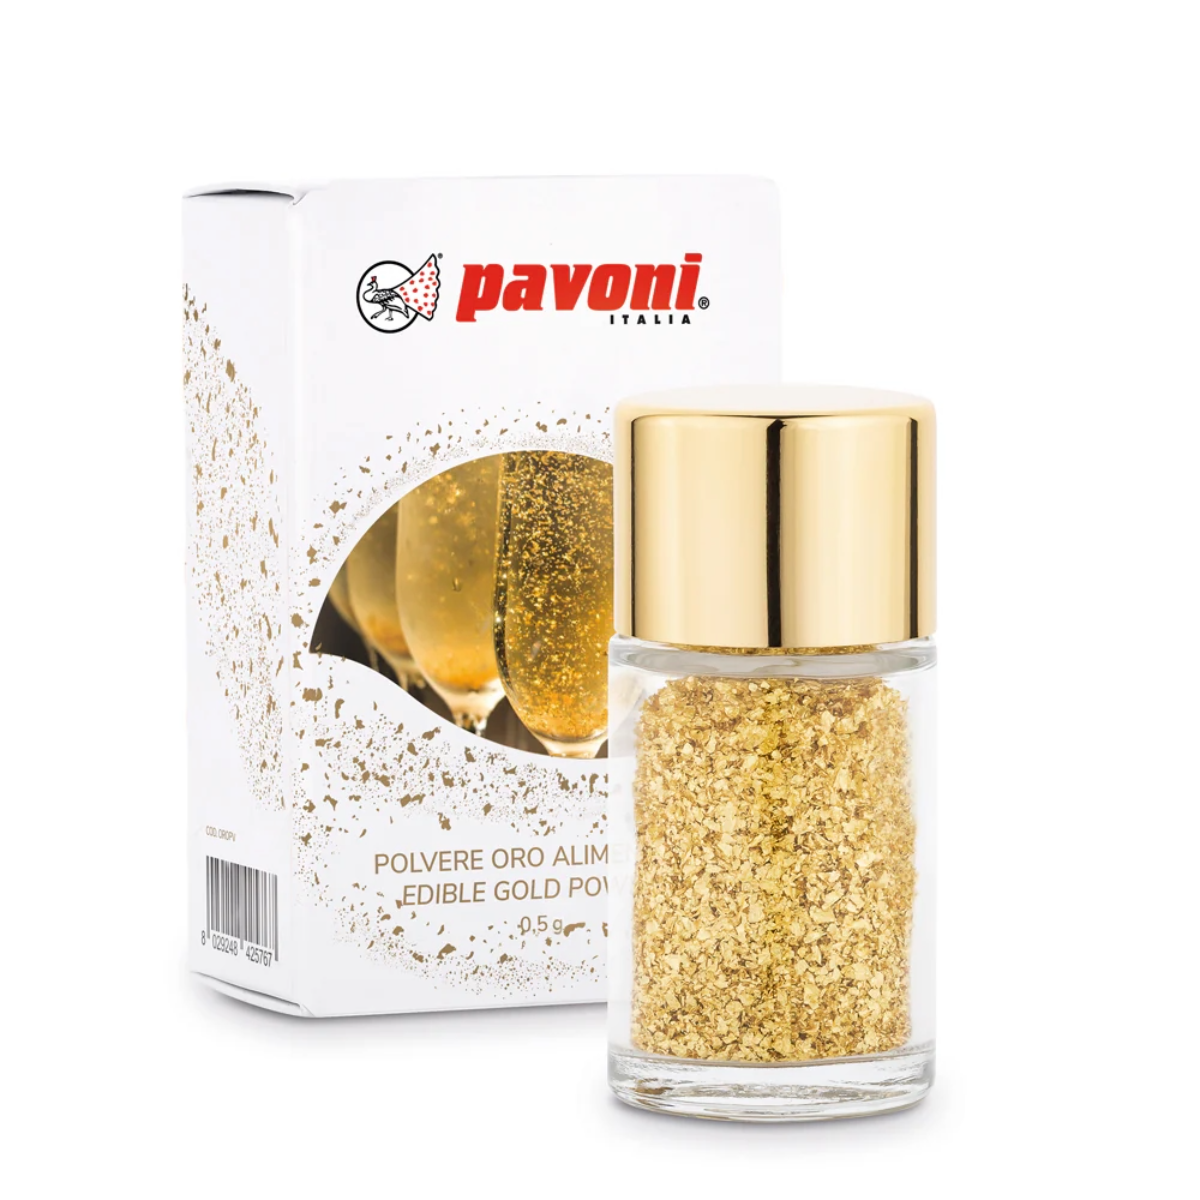
After demolding, enhance presentation with additional decorative elements. Dust tops lightly with metallized powders using soft brushes for subtle shimmer. Drizzle contrasting chocolate over surfaces creating professional striped patterns.
Consider adding small chocolate decorations like curls, leaves, or piped designs emphasizing the cherry theme. Our decorating combs and scrapers create textured patterns in chocolate before full crystallization. These finishing touches transform simple molded cherries into impressive artisan confections.
Troubleshooting Common Problems
Leaking Liquid Centers
Liquid seeping from chocolates indicates sealing problems or excessive invertase activity. Inspect pieces for thin spots, cracks, or incomplete sealing around stems. These structural weaknesses allow liquid escape as fondant liquefies. Ensure chocolate shells maintain adequate thickness and complete seal during molding.
Excessive invertase causes over-liquefaction creating pressure that forces liquid through any weak point. Reduce enzyme amount in future batches if consistent leaking occurs despite proper technique. Some recipes use as little as 1/8 teaspoon invertase per batch with excellent liquefaction.
Fondant Not Liquefying
Solid fondant centers after 2-3 weeks indicate insufficient invertase or improper storage conditions. Verify enzyme remains active; invertase loses potency with age or improper storage. Purchase fresh invertase and store refrigerated for maximum activity. Enzyme works best at room temperature; chocolates stored too cold develop liquid centers slowly.
Fondant that's too dry or contains insufficient moisture won't liquefy properly. Ensure proper water content in fondant recipe and maintain adequate humidity during storage. Excessively dry environments inhibit enzyme activity slowing or preventing liquefaction.
Chocolate Bloom Issues
White streaks or spots on finished chocolates indicate bloom caused by temperature fluctuations or moisture. Fat bloom occurs when chocolate warms and cools repeatedly; sugar bloom results from moisture contact. Prevent bloom by maintaining stable storage temperatures between 60-65°F (15-18°C) with humidity below 50%.
Properly tempered chocolate resists bloom better than improperly crystallized chocolate. Store finished pieces in airtight containers protecting them from temperature and humidity variations. For more information on preventing bloom, check out our guide on how to avoid chocolate bloom.
Storage and Shelf Life Management
Optimal Storage Conditions
Store chocolates in single layers separated by parchment paper preventing pieces from touching. Use airtight containers maintaining consistent temperature and humidity. Ideal storage temperature ranges 60-65°F (15-18°C) allowing invertase activity while preventing chocolate softening.
|
Storage Phase |
Duration |
Temperature |
Humidity |
Purpose |
|
Initial Cure |
Days 1-3 |
Room temp (68-72°F) |
40-50% |
Enzyme activation |
|
Liquefaction |
Days 4-14 |
Cool (60-65°F) |
40-50% |
Center development |
|
Peak Quality |
Weeks 2-4 |
Cool (60-65°F) |
40-50% |
Optimal texture |
|
Extended Storage |
Weeks 5-6 |
Cool (60-65°F) |
Below 50% |
Quality maintenance |
Avoid refrigeration unless absolutely necessary; cold temperatures slow invertase activity while temperature fluctuations risk bloom. If refrigeration becomes necessary, bring chocolates to room temperature gradually in sealed containers preventing condensation.
Packaging for Gifts
Present your chocolates in elegant packaging that protects them while showcasing craftsmanship. Clear boxes allow visual appreciation without unwrapping, while decorative tins provide vintage charm. Our display options offer various presentations from rustic to elegant.
Include best by dates on packages indicating optimal consumption window. Explain to recipients that liquid centers develop over time, with peak texture occurring 2-3 weeks after production. This education enhances appreciation for the craftsmanship and enzyme science involved.
Scaling Production
Moving from small-batch production to larger operations requires workflow optimization and quality control systems.
Efficient Workflow Organization
Organize production systematically for efficient creation. Prepare all cherries and fondant before tempering chocolate, ensuring components await ready for assembly. Temper larger chocolate quantities maintaining working temperature longer using professional melters.
Work assembly-line style: create all chocolate shells, position all cherries, seal all molds simultaneously rather than completing individual chocolates. This approach maximizes efficiency while chocolate maintains optimal temperature.
Quality Control Standards
Establish inspection criteria ensuring consistent quality. Check each piece for proper gloss, complete seal around stems, and absence of air bubbles or cracks. Reject pieces with visible defects for consumption rather than sale, maintaining brand reputation.
Document production variables including cherry variety, fondant recipe, chocolate brand, and ambient conditions. This record keeping identifies patterns affecting success rates, allowing process refinement over time. Temperature and humidity logs prove invaluable for troubleshooting recurring problems.
Investment in Professional Equipment
Quality equipment transforms production efficiency. Professional tempering machines eliminate manual variability, while cooling equipment maintains optimal crystallization temperatures. Explore our bakery machines collection for equipment that can take your chocolate work to the next level.
Conclusion
Mastering chocolate covered cherries in molds combines confectionery science with artistic presentation, creating impressive treats that delight through both appearance and unique texture. Success requires understanding invertase enzyme function, executing precise molding techniques, and maintaining optimal storage conditions allowing proper liquid center development. Whether crafting elegant gifts, building seasonal product lines, or exploring advanced chocolatiering, these methods provide a comprehensive foundation for cherry chocolate excellence. Discover professional molds, quality chocolate, and specialized equipment at Zucchero Canada to create cherry chocolates rivaling the finest artisan confections.
References
Greweling, P. (2023). Chocolates and confections: Formula, theory, and technique for the artisan confectioner (3rd ed.). John Wiley & Sons.
KREA Swiss. (2024). Professional food equipment and spray systems. https://kreaswiss.com/food-equipment
National Confectioners Association. (2024). Enzyme applications in confectionery production. NCA Technical Manual.
Pavoni Italia. (2024). Professional color collections for chocolate decoration. https://pavonitalia.com/en/collections/professional-collezioni-colori-e-materie-prime
Tressler, D. K., & Woodroof, J. G. (2023). Food products formulary: Vol 1. Meats, poultry, fish, shellfish (Reprint ed.). AVI Publishing.


Leave a comment
All comments are moderated before being published.
This site is protected by hCaptcha and the hCaptcha Privacy Policy and Terms of Service apply.